Uploading a Profile Picture or Image (Avatar)
Learning Tip:
**To learn and implement best? Have this page open in a tab at the top of your browser, and a tab open of the forum and in the page begun where you want to post a topic or reply. (You can have two tabs of the site open at the same time.)
Like so many of these directions, they are actually easy if you know the steps and can do the clicks. So although there are many images below–you will be done with this in two minutes, and you can have this tab open to check while you upload
your Profile Picture or image. (Avatar)
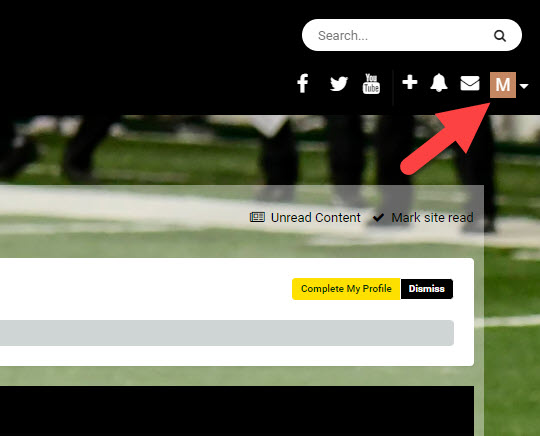
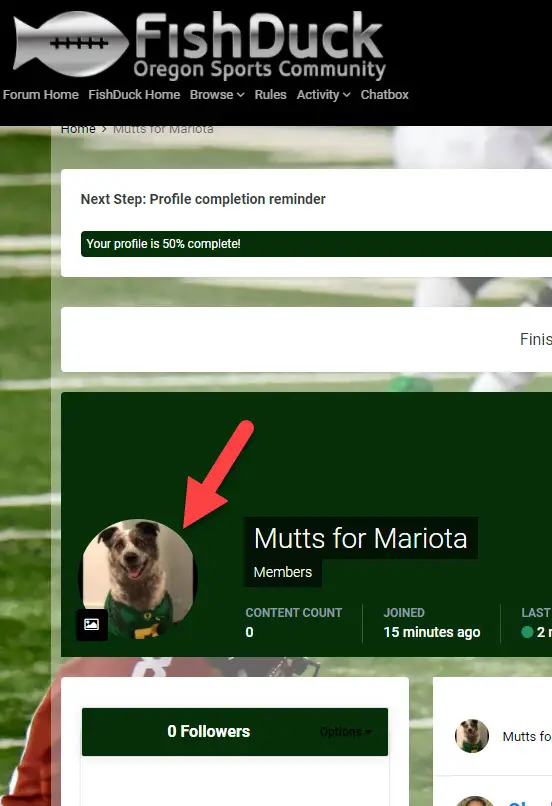
The new member of the forum, Mutts for Mariota, (above) wants to upload their Profile picture and the place to start is in the upper right corner of the front page of the forum. After you are signed in, click on the button that has your current profile image, which is a letter of your Posting Name or the helmet that Charles loaded for you as a default.
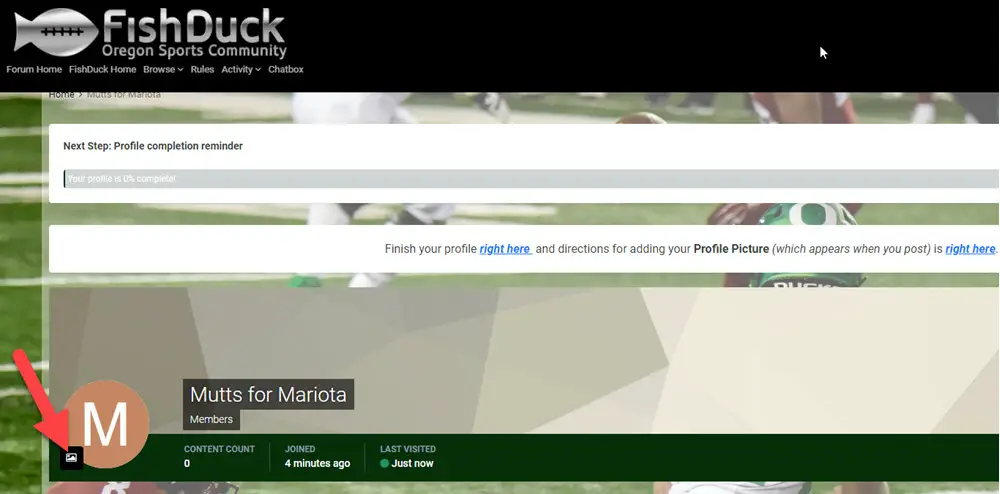
After clicking on that letter image (or helmet) in the upper corner–it will take you to your Profile Page, and you can see the Profile Page above for Mutts for Mariota. Next, you click on where the bigger letter image–the red arrow is pointing to…
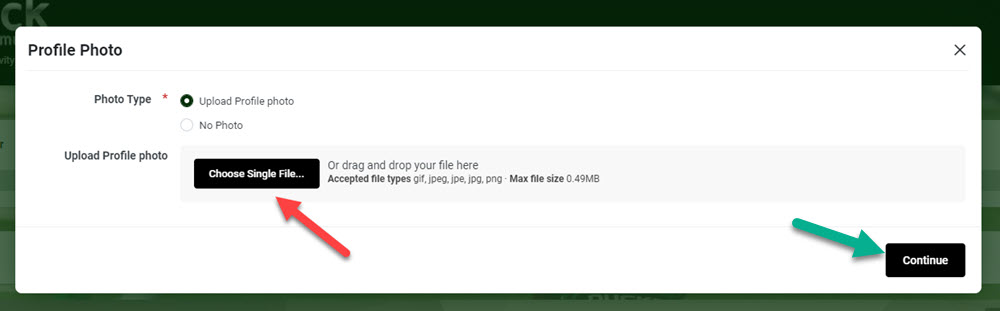
A box similar to the one above will appear and you want to upload Profile photo, click on “Choose Single File” (red arrow above) and then click on “Continue.” (Green arrow above)
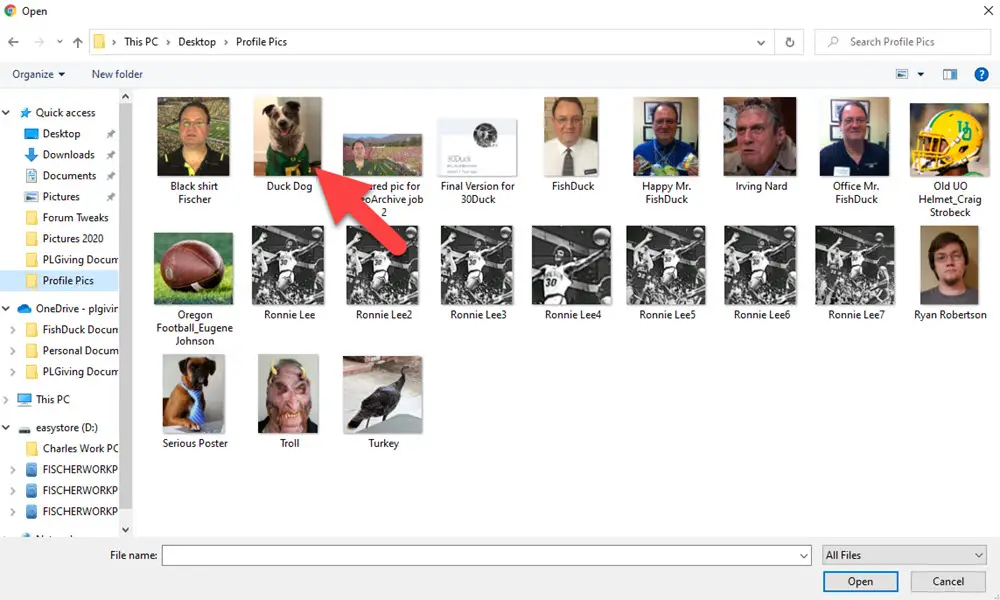
This will now bring up your computer and you then find the file that has the photo or image in your computer files you want to use. (This means you need to have one saved ahead of time) See the red arrow above points to the image I am clicking on, and then click below on “Open” as you see above.
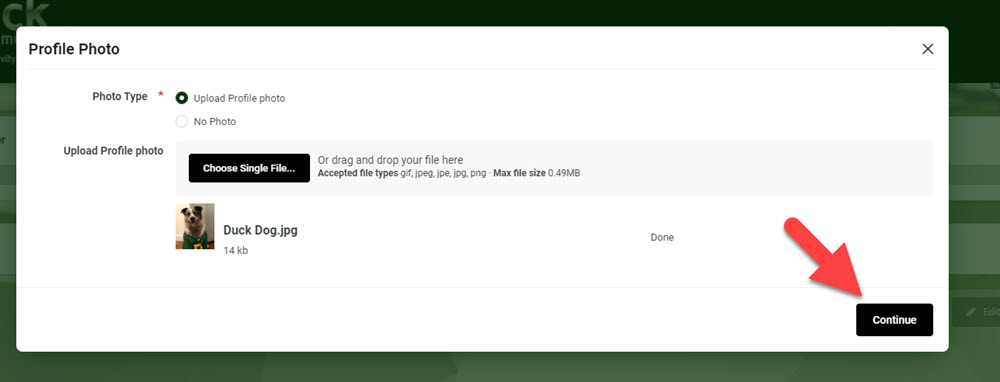
After it loads into the forum website–you will see a box appear as you do above. The picture is loaded and now you click on “Continue.” (Red arrow above)
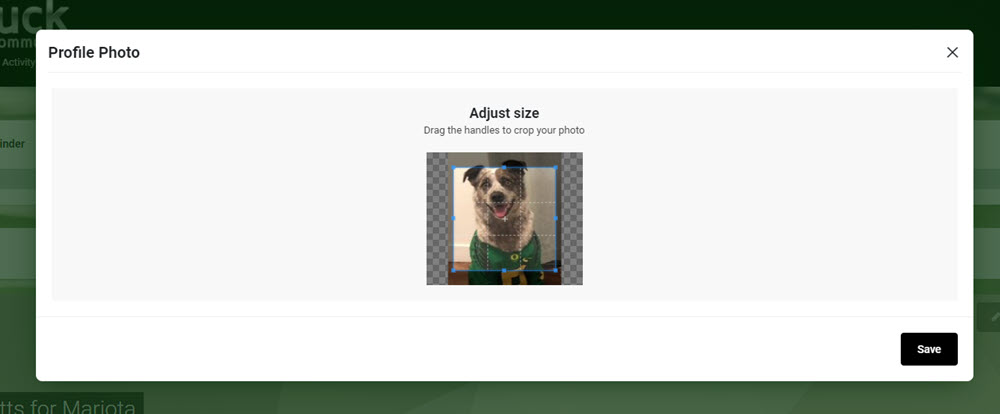
Now comes the only aspect that you may want to do a time or two in order to get it the way you want (above) and that is cropping. The square with the blue outline is the cropping square and what is in it is what is loaded as your Profile Picture when you save it. You can move that square by left-clicking on the blue square and hold and you can move it up and down to adjust the area being saved.
You can also expand the square…even into the checkered area to make sure what you have is centered in the round Profile Picture that appears on the site.
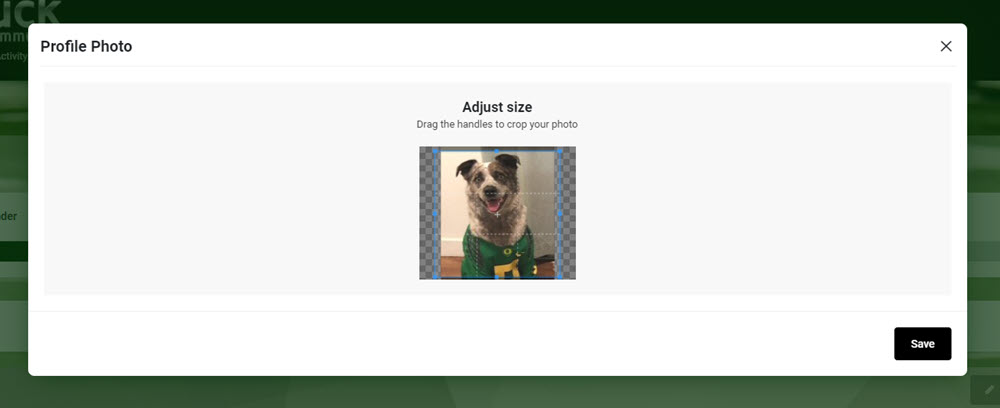
In this case … expanding the cropping area into the checkered borders (above) is what I did to have that sweet doggie centered for the Profile Picture. (I still miss my Abbie) Click on “Save” when you like it!
Above is what it looks like on the Profile page (red arrow above) and if you want to tweak it–click on the black and white picture image in the lower left corner of your Profile Photo on your Profile Page and you can go through the process again or upload a different photo or image.
I’ll bet it took you a lot less time to do this than it took me to create these directions. This assumes you can save a photo into your computer, and if you cannot, then do what I do and find a tech savvy person to help. (Or have me load a helmet Profile Picture for you like the one of AJ Feeley below)